Sunday, 15 July 2012

For Donation plus a tutorial (sort of)

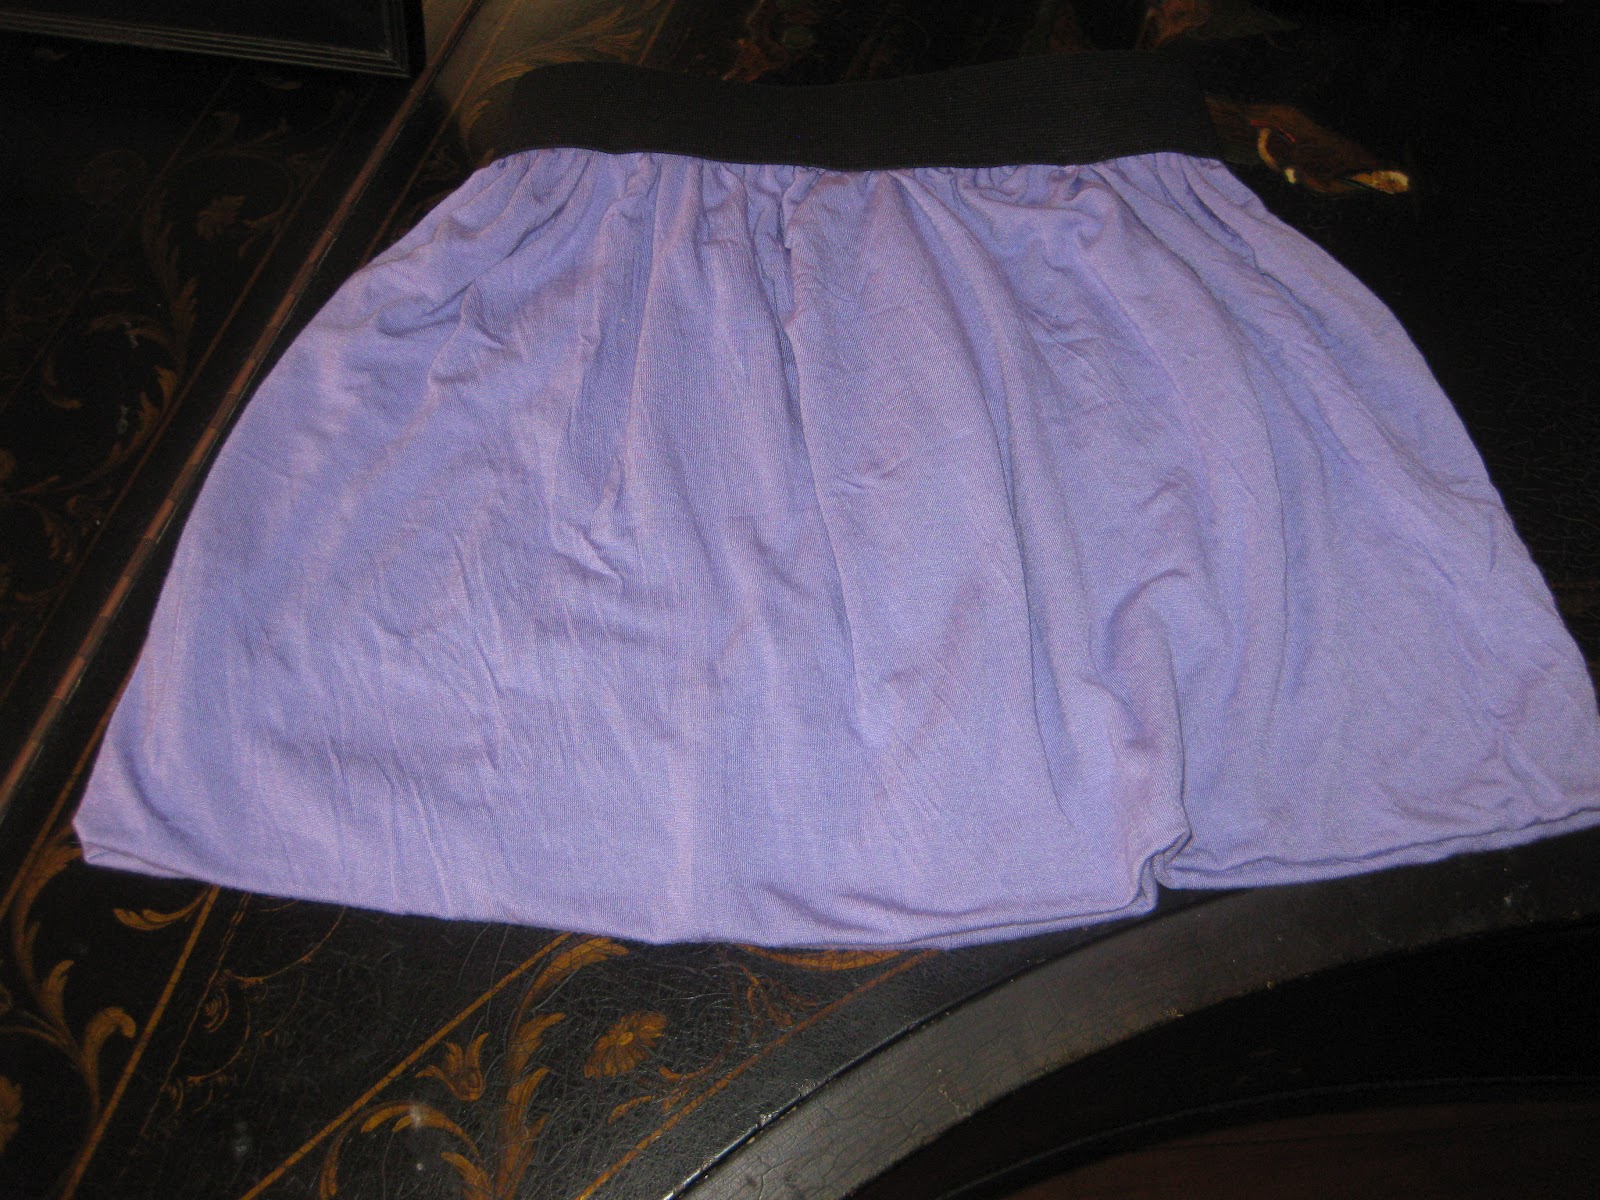
I read about Skirting the Issue and decided to make a few skirts to contribute.  I wanted to make some skirts for older girls (not pre-schoolers).  I figured enough people would make the basic elastic waist cotton skirt (which is a great skirt for little ones) so I wanted to use some fabrics more suitable for older kids.  I made 4 - one is for a teen and has a 3 inch wide elastic waistband with a polka dot silky skirt body.  The other three are knit skirts (the purple is bamboo knit and the pink is cotton jersey).  One is a bubble, the other 2 have layered asymmetrical hemlines. 

The directions below are for the assymetrical hemline skirts above.  I didn't take any good pictures while working so I am sorry if this isn't as clear as I would like.

You will need: .75-1 yard of knit fabric, thread, 2 inch wide elastic, sewing machine, ball point needle (recommended), cutting mat, & rotary cutter.


1.  Cut 2 rectangles from your knit fabric.  The first should be the length of the skirt you want plus about .5 in by about 1.5 the width of your waist measurement.  The second should be about 2- 3 inches shorter (same width). 

2.  Cut your elastic.  I used 2 inch wide black elastic.  It should be the length of your waist measurement plus 1 inch. 

3.  If your fabric has right sides, put them together and, using your sewing machine's stretch stitch, sew the sides of the first rectangle together.  Repeat with the second. You now have 2 tubes.

4. Put one tube inside the other (both tubes with right side out). The longer layer should be on the inside and the shorter layer on the outside. Using a long straight stitch, stich them together (you can remove this stitch later if you want, it is just to hold the layer in place while you attache the waistband.

5.  Sew the ends of your elastic together with a .5 seam allowance.  Zig-zag each end to prevent fraying (could do this first).  Then stitch down each end to the band to make it sit flat.

6. Pin the center seam of the elastic to the center seam of the tubes of fabric.  The elastic should be on the outside and the fabric should overlap into the elastic about .5 inch. 

7. Find the opposite side of the skirt and the opposite side of the elastic and pin them.  The fabric is wider than the waist band so you want to pin it carefully.  You will stretch the elastic as you feed it through your machine.  This is more easily done if you stretch a small section at a time.  I like to pin in 8 evenly spaced spots.

8.  Sew the skirt to the waistband.  You need to grip the fabric and elastic firmly and stretch the elastic.  Gently feed it through the machine.  Any time you let go of the fabric, stop sewing first!!  I backstitched at the start and finish of this line of stitches. 

9.  Lay your skirt out on a cutting mat.  Use a ruler or straight edge to cut the bottom of each layer at an angle.  A rotary cutter will work better than scissors because knit fabric stretches as you cut with scissors resulting in an uneven line.

Note that I separated the layers before cutting each one.  In the picture below the longer layer is being cut and the shorter one is pulled up.  Then I pulled the longer inner layer up and cut the outer layer. 


I goofed on the pink one and cut the layers too short so I added some ruffles.  Now I think it is my favorite of the bunch!  (for a little girl, I can't see myself in neon pink. . . )

Thursday, 12 July 2012

Rainbows

Maya has been very jealous now that Hannah is dressing more like a big girl.  Hannah has a striped sundress that has Maya seeing green.  She shed tears over not having a rainbow dress herself.  Lucky for her I recently purchased some knit fabric in a cute rainbow print from The Fabric Fairy.  I also bought some striped rainbow fabric from Joann's.  Here are the finished products:

Tuesday, 3 July 2012

A-line dress from a t-shirt

I had to run a quick errand at Kmart the other day.  As the girls and I walked in (Sam was with one of his ABA therapists), we passed a rack of t-shirts on sale for just a few dollars each.  They were pretty shapeless and I almost walked by but then I realized that they were made from a nice strong interlock knit fabric.  I had Maya pick one out and when I got home I cut out an a-line dress, made some bias trim straps and literally within 20 minutes Maya had a new dress.  For Maya's narrow build this dress is perfect.  If I make more I will switch the bias binding across the tops for an elastic casing (I like a little gather at the top of an a-line or else it just looks too boring). The great part about this project was that the hem was already finished for me.  I don't have a serger so I can't give a garment hem that fully polished look. 


Maya has terrible red-eye in this picture.  I fixed it but I can't get the fixed photo to load in the proper rotation.  Oh well. 

Sunday, 17 June 2012

Doodle Pants - A Way to Rescue Fabric

I bought some grey brushed twill a while back and when I washed and dried it in preparation for use, the color got all funny.  The fabric looked blotchy and I thought it was going to be a total waste.  I had planned solid grey pants for the girls and the fabric now looked like someone had spilled juice on it.  The fabric sat in my stash for a couple of months until yesterday when an idea popped into my head.  Since the fabric looked stained, why not make it look like it was stained on purpose?  I thought some careful bleach drops might do the trick.  As I thought it over some more I suddenly got an image of acid washed jeans with splatter paint and grafitti all over them (I might have had a pair like that when I was a kid around 1986 or something. . . maybe. . . . ).


I got out a spray bottle and started bleaching. I let the bleach set for a few minutes to fully do its work.  Then I washed and dried the fabric. 


Next I dug out my fabric markers.  I wanted to cover them with grafitti-like designs but when I went to start I realized I have no skills in that area.  I used to be able to draw a mean set of bubble letters but even that escapes me now.  So,  I asked Maya what designs she wanted and she requested stars, hearts, swirls, and rainbows. 


I heat set the markers in the dryer.  Last night I cut out some pants and today I sewed them up.  This is Maya's pair.


I think these are my favorite homemade pants yet.  I mey even go back and add some more doodles.  All I have to do is pop them in the dryer again to heat set anything added.

Wednesday, 6 June 2012

I love some of the prints in the "A Walk In the Woods" fabric collection.  I finally bought some from this etsy store.  I made both girls simple peasant dresses with a band of ruffle down the front.  If I make this again I will make the ruffle a little wider.  Hannah was the only one who kinda sorta posed this time.  Maya slept late and I didn't have a chance to grab a picture of her.  When it comes out of the wash and gets its second wear I will get her.

Sunday, 3 June 2012

How to make a totally original skirt

First, get about a half yard of broadcloth.  Lay it out on a table with some kind of backing to protect the table.  I used wax paper.  Tape down the cloth on top of the backing.


Second, find a preschooler.  You see a preschooler isn't influenced by what is trendy so she won't opt to try to paint the latest craze on the fabric like owls or argyle patterns (Don't get me wrong, I LOVE owls, but we are going for totally original here).  Set out the fabric paint on a paper plate and give your preschooler a paint brush.  Let her go to town. 


We had some paint splatter when I quirted out the blue so Maya got put in the shower to rinse off and we opted for a bathing suit to wear for the rest of the project

I ended up joining in and upcycled some of my son's too small undershirts into nightshirts for the girls.

Let the paint dry for 72 hour minimum.  Wash and dry the fabric.  Turn it into a cute skirt!  Bribe your preschooler to pose for a picture by giving her a cookie.

Friday, 1 June 2012

The "Elastic On The Outside" Skirt (tutorial)

As of now I don't have a brilliant name for this skirt so I am calling it what it is.  I had skirts on the brain because of Skirt Week on Crafterhours.  I had actually made myself stop making the girls skirts for now because, well, they have too many.  But Skirt Week posts inspired me to try to think of something new.  I have done the elastic waist, the tiered, the circle, and even some Oliver and S skirts.  My mind kept drifting to skirts while I was at work yesterday and suddenly I had an idea. 

I have this 2 inch wide hot pink elastic that I have been saving for a while.  I bought a bunch of elastic on Etsy a while ago (which I might never do again due to the shipping cost but the elastic is NICE).   I wanted to make something where the elastic would show. 

This skirt is for my 4 year old who still wears a lot of 3T clothes.  I would call it a 3T/4T.

I started with some plain pink broadcloth (just under 1/2 yard).  Cut the fabric to the length you want plus about 4 inches.  Then cut the width of the fabric to double the waist measurement of your child.  The reason for this is that you are going to stretch the elastic as you sew and if you have too much fabric and a small waisted child, you won't make it around. 

Sew the sides together so you fabric is like a tube. 

Then fold and press the top edge over 1/4 inch to the wrong side. 

Then fold and press about 1 1/2 inches. It doesn't have to be exact because you are going to sew the elastic over the top of this seam.  Pin and sew all the way around. 

Then sew another line of stitches about 1/8 of an inch from the top.  That step is optional but I like the way it looks.

Cut your elastic to the size of you child's waist plus 1 inch.  Sew sides together (wrong side out).  Then sew down the raw edges so they sit flat(you could serge then if you have a serger but I don't have one.  I haven't had much trouble with elastic fraying).


Take the seam of the elastic and match it up with the seam of the skirt.  Pin it ON THE OUTSIDE about 1 1/4 inches down from the top (again, the exact distance doesn't matter too much, you are just going for the paper bag look here).  Pin the elastic in at least four evenly spaced spots.  The fabric is going to look bunched up but you will stretch the elastic as you go. 

Start at the back where you first pinned the elastic to the fabric.  I prefer to start along the bottom of the elastic but it would probably work the other way around too.  Stitch along the edgeof the elastic (backstitch at the beginning and end).  Grip the fabric and the elastic both in front of the presser foot and behind it.  I gripped at the pins.  Stretch out the elastic and feed the fabric through as you stitch the elastic to the fabric.  Repeat along the top of the elastic. 

Finally, hem your skirt.  I folded up 1/4 inch to the wrong side and then abotu 1 1/4 inches again.  I did two lines of stitches again because I like the look.  DONE!

And on the girl. . .
Variations?  Make a ribbon bound hem or add some pockets.  I didn't on this one because I wanted to highlight the "elastic on the outside" feature.  But next time I might add some more details.

If you want to make something like this and you can't find colored elastic, check out this tutorial on coloring it yourself.